Warning: This post is not for the faint of heart.
After Zoom released a recent update that finally enabled high-fidelity audio, I went on a quest to up my audio game in Zoom. But I was having problems achieving the promised “high fidelity” despite having checked all the right boxes and selected the proper settings. So what follows is a description of my current setup, which is finally producing great quality audio, in stereo (if their client supports it).
The Gear
- 2017 Macbook Pro
- Focusrite Scarlett 2i2 (2nd gen)…thanks Neil!
- A Røde NT1 Condenser Mic (any mic will do)
- Yamaha Piaggero NP-12 digital keyboard (any MIDI keyboard will do)
The Software
- Zoom (running the latest version)
- Soundflower
- Garageband (but any DAW that allows monitoring of multiple tracks simultaneously would work)
The Setup
With all of the gear plugged in and connected to the computer, here is the process of getting the software installed and configured.
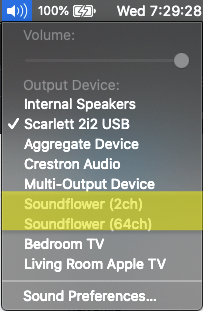
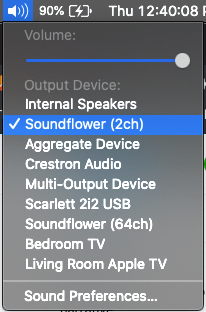
Soundflower is a system audio extension that allows audio to be routed internally from one to another. The installation process is pretty straightforward. But this won’t install an app on your computer. Instead, after installation, you’ll see two new sound options in the sound menu.
We don’t need to do anything else with this for now.
Next, you’ll need to head to your Audio MIDI Setup. This is a system application located in the Utilities folder in Applications.
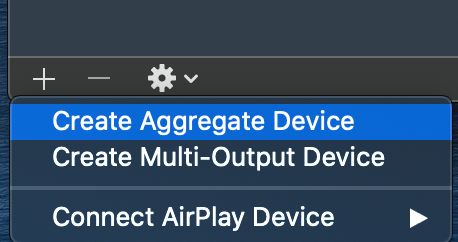
There, we’re going to create two new virtual devices. Click the + icon in the lower left and choose “Create Aggregate Device.” This virtual device will allow MacOS (and Core Audio) to recognize the inputs from each selected device as one virtual interface. Each devices input will be accessible simeltanuously. We’ll use this ability in Garageband later.
Using the checkboxes in the “Use” column, select “Soundflower (2ch)” first, then select whatever input you use for your microphone. In my case, it’s my Scarlett 2i2. The order in which you select the inputs is important, as it will affect the order of the inputs in Garageband.

The last thing we need to create is a “Multi-Output Device.” Create this the same way by clicking the + icon in the lower left and choose “Create Multi-Output Device.” This virtual device allows audio outputs to be delivered to multiple different outputs. We need this so that we can monitor the audio from Garageband. Without it, we wouldn’t be able to hear anything being played through Zoom. Here, the order doesn’t matter, but we want to select “Soundflower (64ch)” and the output you use to listen (which in my case is the Scarlett 2i2).

NOTE: There are two Soundflower devices, one with (2ch) and the other with (64ch). For the sake of your own sanity, be sure to use (2ch) in the Aggregate Device and (64ch) for the Multi-Output Device. If you do the opposite, Garageband will present you with over 60 different inputs to choose, making things much more complicated.
That’s it for the Audio/MIDI Setup.
Next, we turn our attention to Garageband. Start a new project, choose an empty project, then click Choose. Garageband will immediately ask you to choose a track type. Ignore this for now and click on the GarageBand menu and choose “Preferences.”

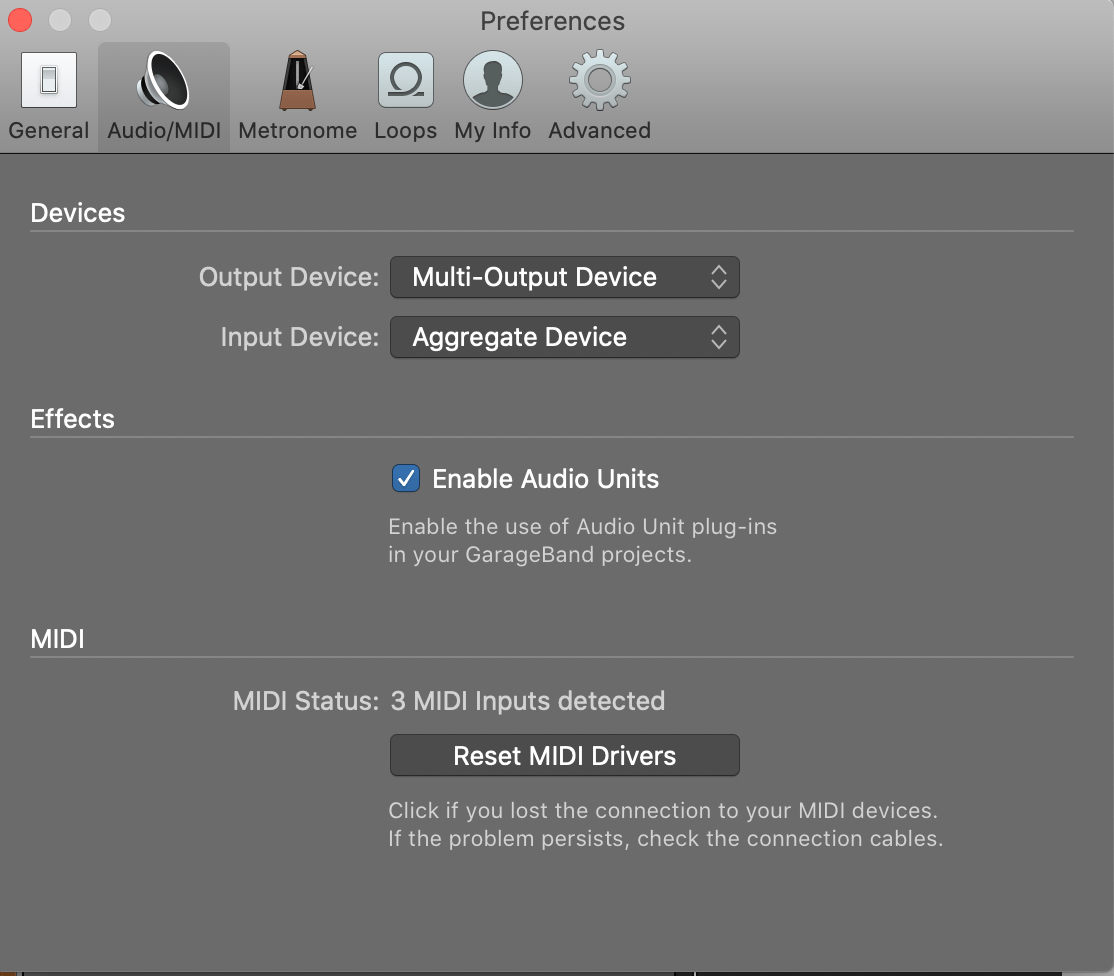
Click on the Audio/MIDI tab at the top of the Preferences window. For the Output Device, select “Multi-Output Device” and for the Input Device, select “Aggregate Device.” Then close the Preference window by clicking the red X in the upper left corner.
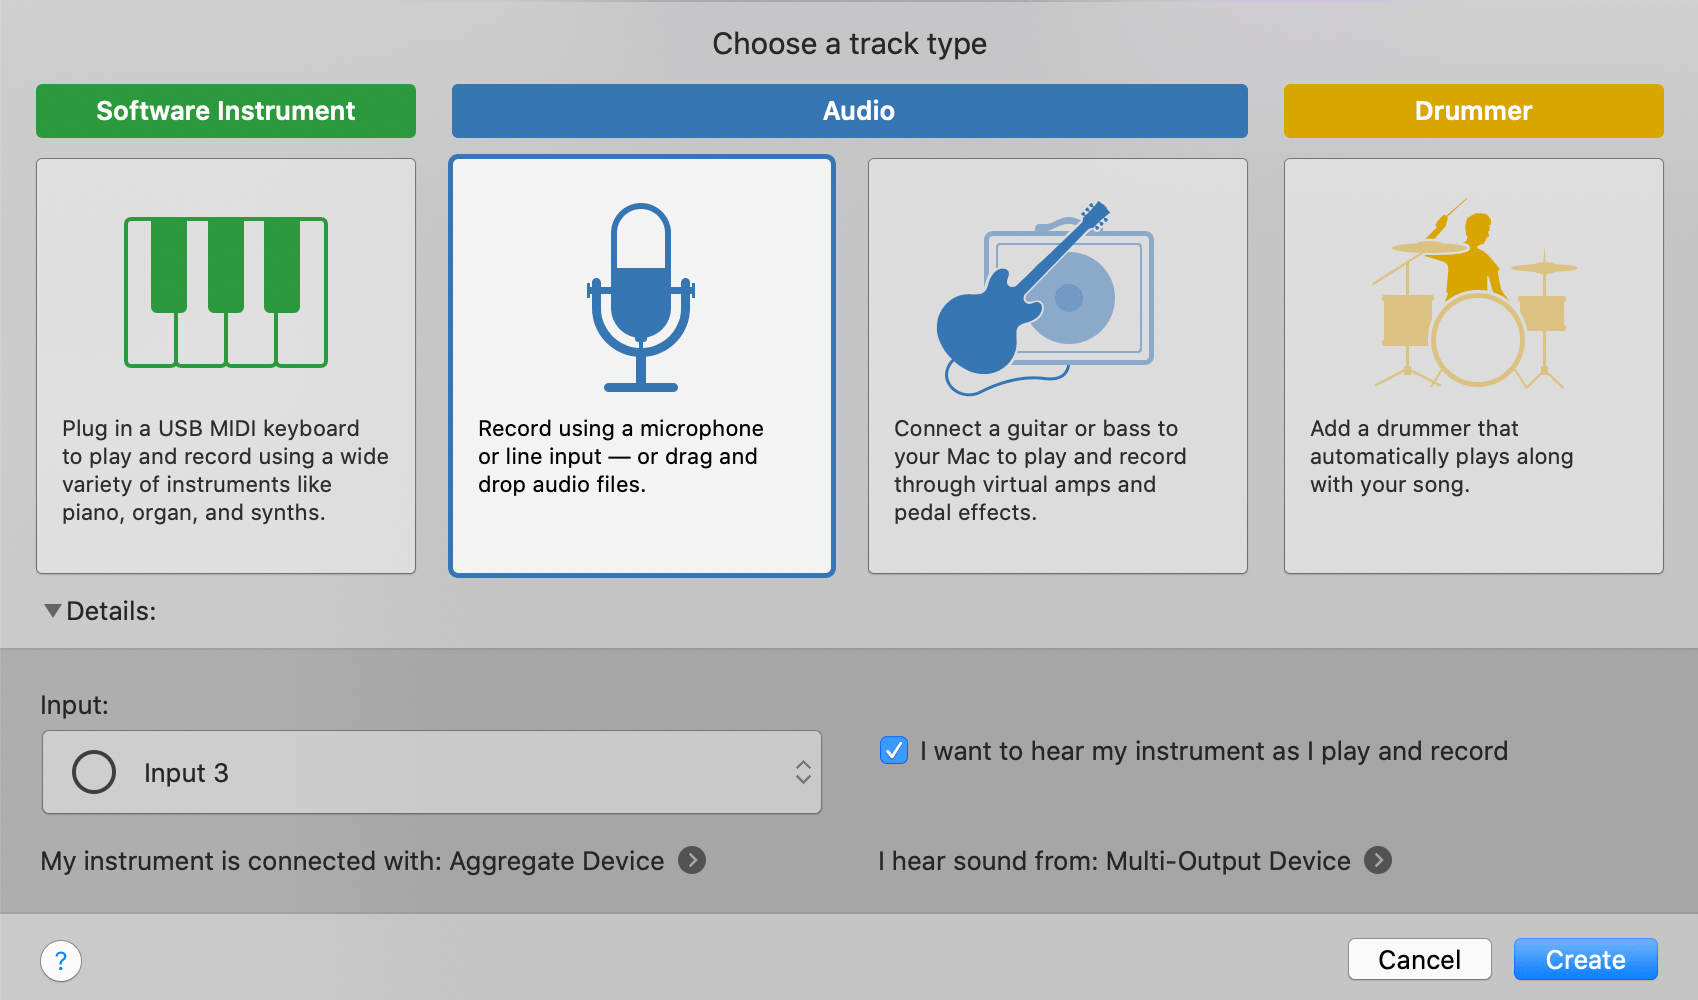
Now, back to “Choose a track type.” We will ultimately be creating three different tracks. For this track, choose an audio track, the one with the microphone logo. For the input, choose “Input 1 + 2.” This track will carry all of your computer audio from Soundflower. So verify that your setup screen looks like this and click create.

Before you do anything else, go ahead and rename this track “Computer Audio” so you’ll remember which one is which later. You can do that by double clicking on the default name “Audio 1” and then typing in a new name.

To create the second track, go to “Track” in the menu and select “New Track…”

We’ll again choose an audio track with the microphone, but this time, we want Input 3. This is the microphone input on my Scarlett 2i2. Remember, Garageband is seeing the Aggregate Device we set up earlier and recognizes all of the inputs from both Soundflower and the Scarlett 2i2. Make sure your screen looks like this and click create.
Rename this track “Microphone.”

This last track is optional, but if you want to play a MIDI keyboard and have the audio be heard in Zoom, create one more track. This time, we’ll choose a Software Instrument and click create.

Now that you have all of your tracks created, it’s time to set up how to monitor them in your headphones. First, we need to get your computer audio routed to your “Computer Audio” track. To do this, simply select “Soundflower (2ch)” as your system audio output.
Now, any audio created by your computer will be routed to the “Computer Audio” track in Garageband. You can test this by playing some music and see if the input levels begin lighting up on that track. To hear the sounds, we need “Record Enable” all of the tracks. Right-click on any of the tracks and choose “Configure Track Header…”

In the menu that pops up, click the checkbox next to “Record Enable.” This will put a new button on each track that looks like the button you see in this menu.
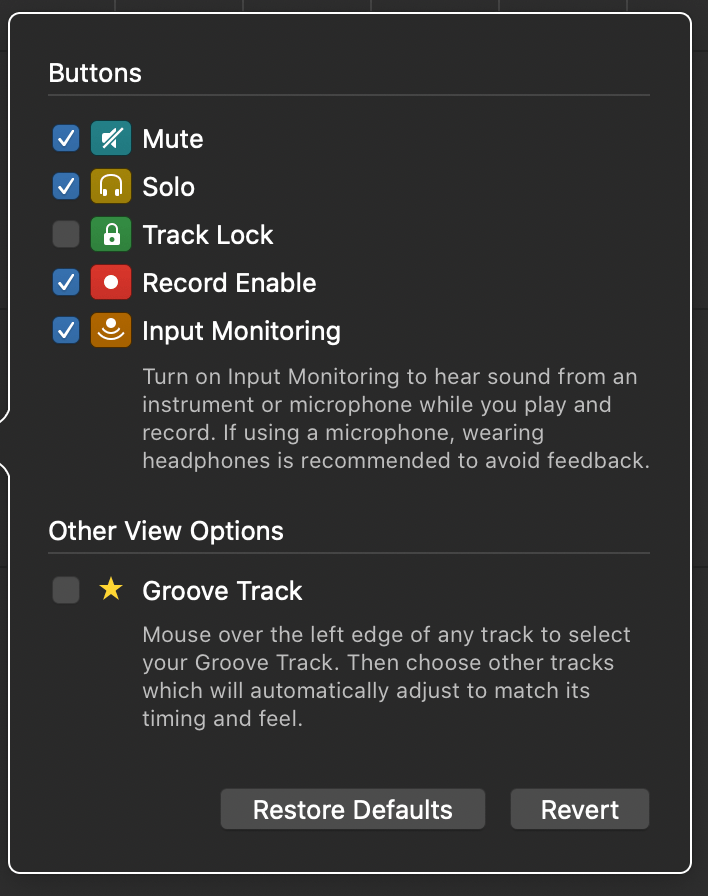
When this button is pressed, Garageband will route the sound from that track to both your headphones (so you can monitor the sounds) and to the “Soundflower (64ch)” output. You’ll need to record enable all of the tracks you wish to use in your Zoom session.

You should now be able to hear both your computer audio and your microphone through your headphones or whatever device you’re using to monitor your computer sounds. For example, I have a pair of headphones plugged into my Scarlett 2i2 that I use for monitoring. Save this Garageband project so that you won’t have to do any of this setup next time.
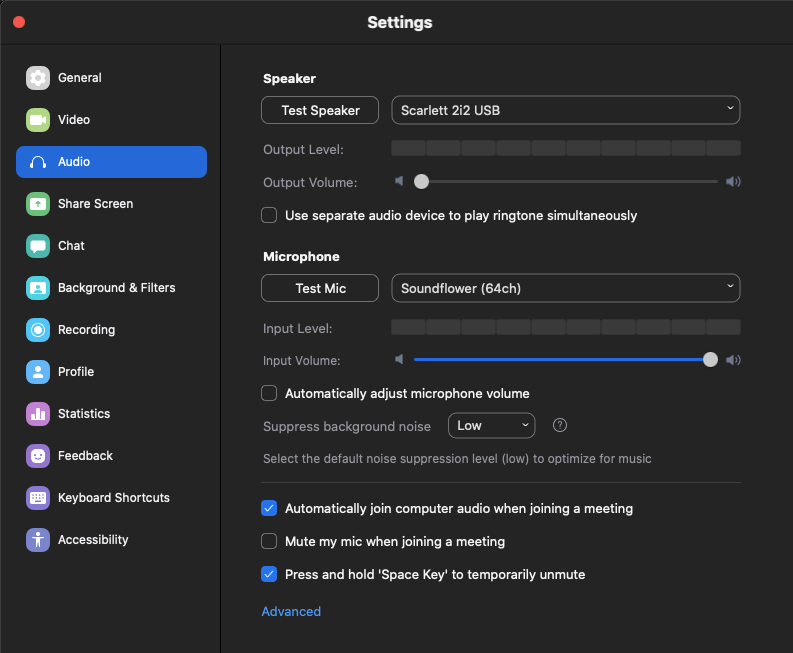
The last step is to set up Zoom. Luckily, this is the easiest part. In Zoom’s settings, head to the Audio menu. Select “Soundflower (64ch)” as the microphone and your monitoring device as the speaker. For me, that is my Scarlett 2i2.
And that’s it! When you join a Zoom call, your microphone and system audio will come through as one signal. An advantage of this setup is that you no longer need to share your computer sound, since it automatically comes through all the time.
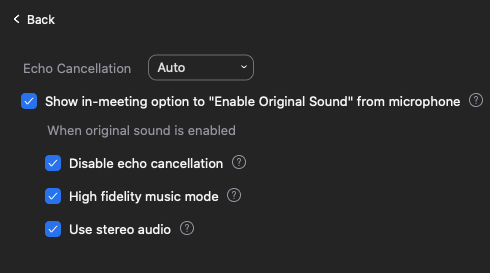
To take things to the next level audio-wise, there are a couple of hidden options in Zoom. First, click on “Advanced” in the audio settings. There, click the checkbox for “Show in-meeting option to “Enable Original Sound” from microphone.” Then, click the checkbox next to “High fidelity music mode.” You’ll see here that I also have a “Use stereo audio” option that you might not have available. Click here to learn how to enable the option.
In a meeting, when you want your audio to sound as good as possible, click the option in the upper left that says “Turn on Original Sound.” NOTE: This text changes to “Turn off Original Sound” when clicked. That means it is turned on and working.

So there you have it! Great quality audio from your computer during a Zoom call. My students have reported that the music sounds great, and I can confirm that this is as good as it can get for audio over Zoom.
